-

Liverpool Loft Insulation Services
Insulating Your LoftReplacing Loft InsulationCan Save YouAround 20% On Heating BillsFree No Obligation QuoteContact Us Today 07585 770919
Liverpool Loft Insulation Services
Remember when you were little your mum would always tell you to put a hat on in the cold weather because we lose so much heat through our heads? Well loft insulation would keep your mum happy as it’s the ‘hat’ for your house.
Most people know that heat rises - if you’re paying to heat your home and the top part is poorly insulated - you’re actually paying a fair chunk of that money to heat the outside.
Feels a little pointless when you put it like that doesn’t it?
Why Do I Need To Insulate My Loft?
It’s estimated that up to a third of that lovely heat you’re working hard to pay for could be doing a runner outside. Government statistics claim that effectively insulating your loft can cut your energy bills by around 20%. That’s not to be sniffed at is it? In real terms, if your monthly gas bill is around £50 for instance, it would then be £40.
And let’s not overlook the fact that extra heating means your boiler is working extra hard too. So not only are you cutting down your monthly outgoings by insulating your loft, you’re also reducing the wear and tear on your boiler and we all know they don’t come cheap.
But the main point here is that you’ll feel a noticeable difference in the ambient temperature of your home.
We’re not sexist so bear with us on this one. With nearly all of the couples in our roofing families there’s almost a feud over the thermostats on the heating - and we know for sure this isn’t only us that have this thermostat ping pong going on.
The amount of couples who smile knowingly when we talk about The Great Thermostat Battle...
It’s like a top secret military stealth operation in our houses!
Our ‘good ladies’ all love their homes being nice and toasty so they’ll sneak the thermostats up by one or two degrees when they wander past them.
Us roofing chaps being outside all day don’t need too much heating. So when we get home it feels like we’re walking into a furnace!
We then go all Mission Impossible to sneak the thermostat back down again - we could teach Tom Cruise a thing or two you know! But there’s no flies on our partners so it’s noticed and the temperature is notched back up again...
...usually with a comment about us ‘taking some clothes off if we’re too hot’ while they do it.
And the standard response to this one is that there’s only SO many clothes you can take OFF - you need to go and put some on…
And so the battle goes. We know you’re smiling to yourself too!
But joking aside, imagine that your home wasn’t losing heat. If you increased the temperature of your house by 20% you’d feel a significant difference. Us roofers definitely would. That’s like turning our houses up from 17 or 18 degrees to 21 or 22 degrees - we’d be cooking! Or we’d be naked! Either way somebody wouldn’t be happy!
You Really Are Just Burning Money Without Loft Insulation
It is estimated that turning your heating up by just 1 degree will increase your energy bills by around 3%. It’s hard to say exactly because there are so many factors to consider, but this is an average so let’s go with that..
So let’s say you are trying to keep your heating at around 18 degrees and we’ll use those government statistics just for safe measure. For your house to ‘feel like’ 18 degrees, your thermostat needs to be set to 22 degrees when allowing for how much of the heat is escaping.
That’s a 4 degree difference which increases your energy bills by 12% just to maintain a temperature while the heating is on. So your monthly gas bill of £50 is now £56 - for no benefit to you at all.
That is just while your heating is on. Add to this, that once the heating is off, your precious heat is escaping. Imagine a balloon which is letting out 20% of it’s air and you’ll get a clear picture of what’s happening in your home. Turn your heating off, and your warmth is escaping like that air. Which means that you need your heating on for longer which is probably where most of your ‘lost money’ is.
If your home is well insulated, when you turn the heating off, it can stay off for far longer. And your boiler gets a rest too.
Besides the savings being made, many of our customers comment on just how different their homes feel after they’ve had their lofts insulated as it makes such a noticeable difference.
Now that you have a feel for how loft insulation can make such a difference to your home, here are some of the Frequently Asked Questions we are asked too...
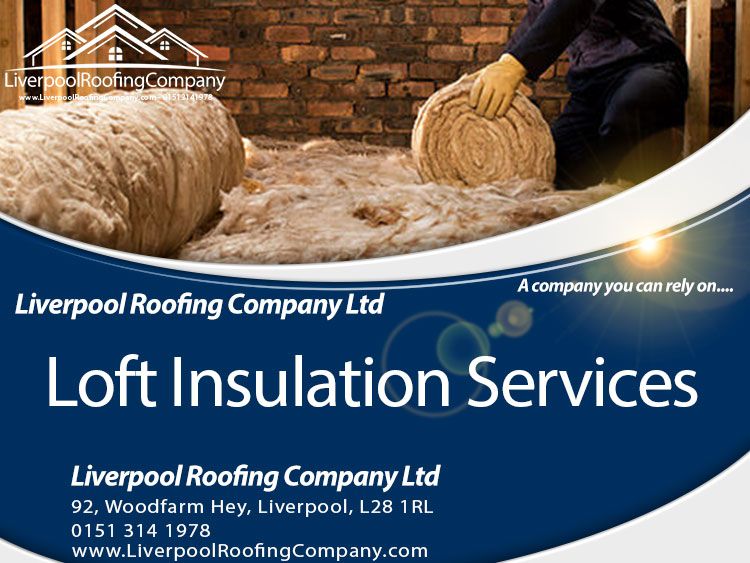
What Is Loft Insulation?
There are a few misunderstandings about the various types of insulation. Roof insulation can come in many forms because there are so many ways of ensuring that buildings are both energy efficient and that you’re not wasting your precious money.
The first point to establish is whether you will be using the loft space as an additional room. For instance, installing ‘warm roof’ insulation or ‘cold roof’ insulation each offer different benefits depending upon how you are using the loft.
Loft insulation is often called Cold Roof Insulation and is located between the joists on your property’s loft floor.
Roof Insulation is often called Warm Roof Insulation and is located between the tiles and the rafters.
Cold roof insulation is what springs to mind when most people think of roof insulation and is when you insulate the loft by placing the insulation on the floor. This is more about insulating the ceiling of the area below the loft floor as it makes virtually no difference to the actual loft space itself ie the heat above the layer of insulation is still escaping.
It’s this type that preserves the heat in the general household like we’ve mentioned.
Warm roof insulation is a different approach altogether and is for when you’re intending to use the loft space as actual living space. In this instance the insulation is installed in the joists just under the pitch of the roof to ensure the actual loft area is insulated enough to be a habitable room.
Both methods will have a significant impact on how your house feels, but if you are not using the loft space as extra living space, the warm roof insulation is possibly overkill in terms of budget.
loft floor, loft space, insulation board, save money, recycled glass, insulation material, loft rolls, home energy, roof insulation, flat roof, installing loft insulation, mineral wool insulation, sheeps wool, energy efficiency, reduce heat loss, roof space, glass wool, energy bills.
How Does Loft Insulation Work
Whichever method you opt for, most of the loft insulation materials work on the basis of preventing heated air moving through the material. Insulating your loft, attic or flat roof is a very effective yet simple way of reduce that precious heat loss we mentioned and you reducing your heating bills.
Like we’ve already covered, loft insulation can help to lower your heating bills quite significantly over time whilst reducing wear and tear on your boiler which in turn also reduces global warming and climate change. Imagine the difference it would make to the world if everyone did this!
One word of caution here though - your attic needs to maintain an airflow to ensure you keep dampness at bay. It’s therefore hugely important that you don’t over-insulate and cut off this vital supply. We know - it seems counter intuitive but you’ve seen what happens to a car windscreen when the heat and moisture combo of the car are out of balance.
Your roof is that windscreen so all of your worldly goods that have survived that annual debate over whether to keep or donate each year - you may as well say goodbye to them now if you get your insulation wrong.
Loft insulation is fairly simple to install which we’ll mention shortly, but as we regularly see people’s roofs and attics we can vouch for just how vital it is to get the airflow right too.
How Much Is Loft Insulation?
Obviously the answer to this is dependent upon so many factors so it’s not a simple ‘one size fits all’ price.
For example, one thing we are regularly asked is if the insulation which is already in the loft can be incorporated into the new insulation? Maybe it is not very thick and you just want to top it up? This is fine as we can leave any existing insulation in the loft and add an additional layer to it.
This will bring your insulation up to the required minimum thickness which we have to adhere to, whilst keeping costs down as regardless of the age of the existing insulation, it will still retains its insulant value.
The size of your loft makes a significant difference too. Do you want boards adding? As you can see, there are questions to be asked first before we can give you a price.
This is why we offer free quotes as we’d honestly hate to say ‘How long is a piece of string?’ but you know that piece of string you have…?
How To Insulate A Loft
The key difference here is whether you’re looking at warm loft insulation or cold loft insulation. As there is so much more to consider for warm loft insulation such as insulating gable ends, between rafters and ensuring the roof is all in good order so we’ll just look into the cold loft insulation here which we’ve covered in the next section.
A key factor to consider first of all though is how accessible your loft is as this is the difference between it being a simple task or a mammoth mission. For instance, If your loft is difficult to access, there are different methods which can be used such as having blown insulation installed with specialist equipment - a professional can come along and blow appropriate insulation material into the awkward to reach spaces - they usually use treated cellulose, polyurethane foam or mineral wool fibre.
Flat roofs can be insulated too but it’s a different process altogether as they usually have a layer of rigid insulation board added. This is either above the roof's weatherproof layer or straight on top of the roofs timber surface with an additional new weatherproof layer on top of that insulation. This is more easily done when the roof covering needs is to be replaced anyway so it’s always worth exploring this if you’re looking at a new flat roof.
How To Lay Loft Insulation
If access to your loft is easy and your joists are regular, one of the easiest ways to insulate your loft is to lay rolls of mineral wool insulation. The first layer is rolled out between the joists and another layer is then laid at right angles covering the joists and making the insulation up to the required depth.
Obviously you’ll need to be very careful where you’re stepping once you have started laying the top layer of insulation, as you can’t then see where the joists are and where is safe to tread.
If you are planning to use the attic purely for storage, you will need to lay boards over the joists for support too with all of your boxes being far too heavy to place onto any unsupported area. You don’t want your Barry Manilow collection falling through the ceiling do you!
Your insulation won’t be thick enough if you only insulate between the joists, so before doing this you may need to raise the floor level to facilitate laying extra mineral wool beneath the boarded floor.
This can be done by fitting timber battens across your joists. You can also buy plastic legs specifically for this which fit on to the joists to support the new floor.
Like we’ve already mentioned, It’s crucial that you leave a ventilated air gap between the boards and the insulation to prevent condensation building up on the underside of the boards.
It’s also important not to squash the mineral wool when you fit the boards on top of it as this this reduces its insulation value.
As you can see, none of this seems like rocket science so it would be very simple for many people to insulate their lofts themselves. We’d suggest just giving us a quick call for a free quote though. Our prices are very reasonable so by the time you’ve been and paid for your materials, filled your car up god knows how many times to transport it home (it’s very greedy on the space is this insulation!) plus your boards and extra jousts, you’ll soon realise it’s easier to leave it to the experts.
Let us come and insulate your home for you - you can put your feet up and have a cuppa in the warm while we do all the legwork - it’s what we do best.
Top 10 Roofing Repair Questions Answered
Is A Roof Leak An Emergency?
Unfortunately, where roofs are concerned, a leak is usually an emergency as leaving it unchecked could really cause some problems. Add to this that roof leaks tend to happen during a rainstorm, this - very inconveniently for you - is when roofers are at their busiest!
If leaks are starting to spring up on more tired roofs, then they are going to show up more and more during our wetter seasons. Try to take a good look at the state of your roof before you get to the wet season but if you do have a leak, we’d suggest getting in touch quickly and we can get to you promptly to keep any damage to a minimum.
What Is The Average Cost Of A Roof Repair?
The average spend of an individual roof repair is between £147 and £670. Quite often it isn’t an isolated problem though so the average cost of a repair visit is around £750. The most common reason for a repair callout is to repair leaks. This can sometimes be as simple as replacing a few slates or tiles but we’ll always look at what’s causing the problem underneath too while we’re able to get close to the problem. If we can see that other problems are likely in the short term, we’ll make sure we bring these to your attention.
Is It Normal For A New Roof To Leak?
Unfortunately, not all roofers are reputable. So if you find that you have just invested in a lovely new roof and in the first rainstorm, you're getting a little bit wet, it's certainly not ideal. Contact the original company who fitted the roof but if they're not being helpful, you will need to quickly source an alternative solution.
Don’t completely panic though - what you can often find is that it isn't the entire roof that’s the problem - if there are protrusions such as chimneys, any valleys, skylights or stack lines, water can gather around these easily and find even the smallest of weaknesses. An ongoing leak can cause significant damage over a period of time though so it's worth getting a reputable company to come and take a look for you at the earliest opportunity,
When Should Roof Tiles/Slate Be Replaced?
Roof Slates & Tiles are pretty hardy so it's not unusual to see a slate roof still going strong after 20 years. But if you take a look at the roofs of the properties in your street and see that other houses are starting to get theirs replaced, it's worth having a look a little more closely at your own.
Signs that the slates or tile are starting to age are looking at the individual edges, maybe they are curling or the tiles are starting to crack and perish. If the whole roof is just starting to look old and worn, it can also look unsightly so you might decide for yourself it’s time to upgrade the aesthetics of your property with a new roof.
Why Do Roofs Leak?
Roofs tend to leak when they have weaknesses in them which can often occur when the roof starts to age. An ageing roof could be leaking for a multitude of reasons such as the roof membrane starting to perish or maybe it’s damaged? Perhaps the roof flashing could have a gap in it? These issues could cause just the smallest of leaks but if any of this creates a ravine in any way, obviously in a downpour the valley for the water will really escalate the problem.
Sometimes, it may actually be improper installation of the materials in the first place. Storm damage can also cause major problems with limbs of trees or branches falling onto the roof so it’s best to keep an eye on these if they’re getting large or weak.
Whatever the cause, don't ignore a small leak as water will work its way inside and given even a small amount of time, it can really do some damage so it's better to nip it in the bud at the first occurrence.
How Do I Know If My Roof Is Leaking?
It may seem quite a daft question as you're probably conjuring up images of water everywhere.
If that is the case, then yes - you most definitely have a leak but we know you’d have worked that part out for yourself!
Sometimes a smaller leak can be much more subtle though, so things to look for are signs like water stains appearing on the ceiling. Once they have dried out, they tend to go a brownish colour, so if you are starting to see brown circles on your ceiling, it could be a problem above that floor.
If you can, try to get into your attic to take a closer look. If you can see drips or moisture on the walls, then this could also be a leak in the roof.
One of the first things to do is pop outside and see if you can get a good look maybe from the kerb at the overall state of your roof. If it looks like it is aging, maybe there are seams between the slates, tiles, flashing or the chimney which may be prone to leaking now that they are starting to perish.
If you need an expert opinion, then give us a call and we’ll come and take a look but a word of advice - it’s best to do this before the winter when the extra water could wreak havoc on a few unchecked leaks.
Is A Leaking Roof Covered By Insurance?
Home insurance can be a little bit of a grey area often having exclusions within it such as wind, hail or storm damage. So really do pay attention to the small print. Many home insurance policies don't cover replacing the worn out parts that are causing the problem for instance pipes or a leaking roof. However, if you have incurred damage as a result of the roof, then quite often you may be able to replace the ceiling, floor, walls or furniture which may have been damaged by the leak.
This really is one to check with a fine tooth comb though!
What Happens If Your Roof Is Leaking?
First things first you look need to look at what is causing the problem and where it is leaking. Minimise the damage by putting buckets in place to collect any leaking water and if you can find the source of the problem, apply a little common sense to what can be done to reduce the imminent damage.
Bear in mind any electrics in the vicinity as you need to ensure there is no electrical hazard to anyone in the house with this being around water.
If you have a substantial leak, you can sometimes find that there will be a bulge starting to appear in the ceiling. It may seem counter intuitive, but poke a small hole in the middle of this and pop a bucket underneath, as letting the water continue to puddle above the bulge could result in the entire ceiling coming down.
Obviously we are here to help so give us a call and we can look at what we can do to advise you.
How Long Should A Slate Roof Last?
Most Slate or Tiled roofs will last a good 20 years but any experienced roofer will recommend you getting an expert's opinion on a roof which is 15 years or older. There are a few sense checks which you can apply such as taking a look at the roof from outside from the kerb to see if they are starting to look tired or to look at the general state of repair of the roof.
You can also do a few checks such as turning your lights off inside your house in the early evening and seeing if there is any light coming into your house through the roof from outside suggesting that there may be gaps in it.
How Much Does It Cost To Repair Tiles On A Roof?
Obviously, it is much cheaper to just repair isolated tiles as and when they need it but what we often see is that tiles don’t tend to fail on their own. It’s common for there to be an underlying problem so we prefer to take a good look whilst replacing your tiles.
If we can see that there is going to be irreparable damage further down the line, we will let you know that maybe a re-roof is a preferable long term investment than the ongoing repairs that will start to crop up.
But in terms of replacing isolated tiles, you are usually looking at around £135 to £220 pounds to replace 10 tiles on an average semi detached house.
Roof Services
0Slate Installs
0Call Outs
0Happy Customers
0Best Places In Liverpool To Eat, Sleep & Drink
Royal Albert Dock Liverpool, 3-4 The Colonnades, Liverpool L3 4AA.
Renovated red-brick dock buildings now housing a range of museums, restaurants, cafes and bars.
https://goo.gl/maps/XWcmfhsXMwVtCQa78
How to have the Perfect Weekend in Liverpool
0151 244 3777
https://goo.gl/maps/87hH8N9iwU2bzSVK9
0151 305 3744
Tapas, Latin-influenced dishes and cocktails in exposed brick, 18th-century church lit by candles.
https://goo.gl/maps/aRQr5NXL9eXGCMay8
Vegan cafe fare & sweet treats whipped up in a charming space with eclectic, brightly colored decor.
https://goo.gl/maps/TidtJrsVrchYjsr76
https://goo.gl/maps/riXNLb8DQtvAtb6V8